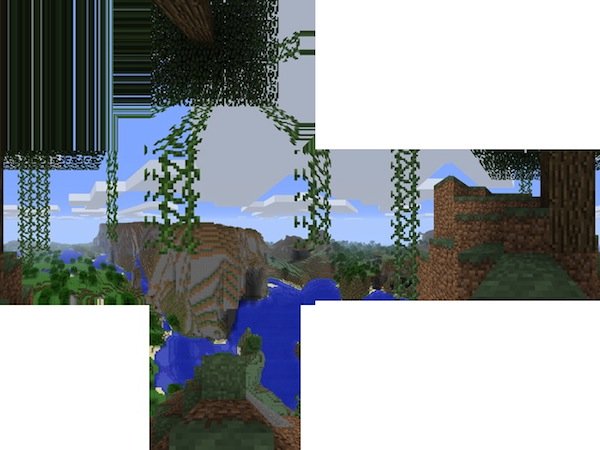
Do you have a passion for photography? If you do then this mod is definitely for you! If not, then you will probably enjoy it anyway- it is THAT fun! Panoramic photos are all nice and dandy in real life (YAWN) but what would you say if I told you that with the help of this mod, you could do it Minecraft? Amazing right?! Look no further, PanoramaKit is here!

With the help of PanoramaKit you can easily snap some images for your Minecraft Menu and finally personalize in style! You can also add them to your texture pack! There are multiple settings and effects to play with! You can devise panoramic images of all sorts, from round oval ones- to square ‘blocky’ ones.
General Information about the Mod!
- Everything useful in the mod is accessed by the ‘P’ Key!
- When the mod captures, it removes things such as the HUD removing the FoV and the resolution! However you shouldn’t worry, everything is restored afterwards!
- Do not have any achievement messages open!
Future Updates are planned for this modification, including updating the text boxes to match the quality of vanilla Minecraft, allowing other keys other than P to activate the image and also to have the option to freeze the game during an image!

Positives and Negatives!
This mod certainly is a step in the right direction for useful and fun mods! It combines aspects of real life and implements them into a game we know and love, what could be better! This mod is mostly positive- except I do have to speculate that there might be a few too many bugs. That is my only concern! However this mod is certainly one to download!
PanoramaKit Mod Version 2.3.2 for Minecraft 1.3.2
- Fixes to make the mod compatible with OptiFine and Clay Soldiers again
- Increased statistics to the pause menu.
How to Install PanoramaKit Mod for Minecraft 1.3.2
- While using WINRAR, do the Following!
- Close Minecraft
- Go to %appdata%\.minecraft\bin
- Right click Minecraft.jar and open it with WINRAR.
- Delete the META-INF
- Now open the Mod’s zip-file in the same way.
- Drag and drop everything into Minecraft.jar
- Done!

